
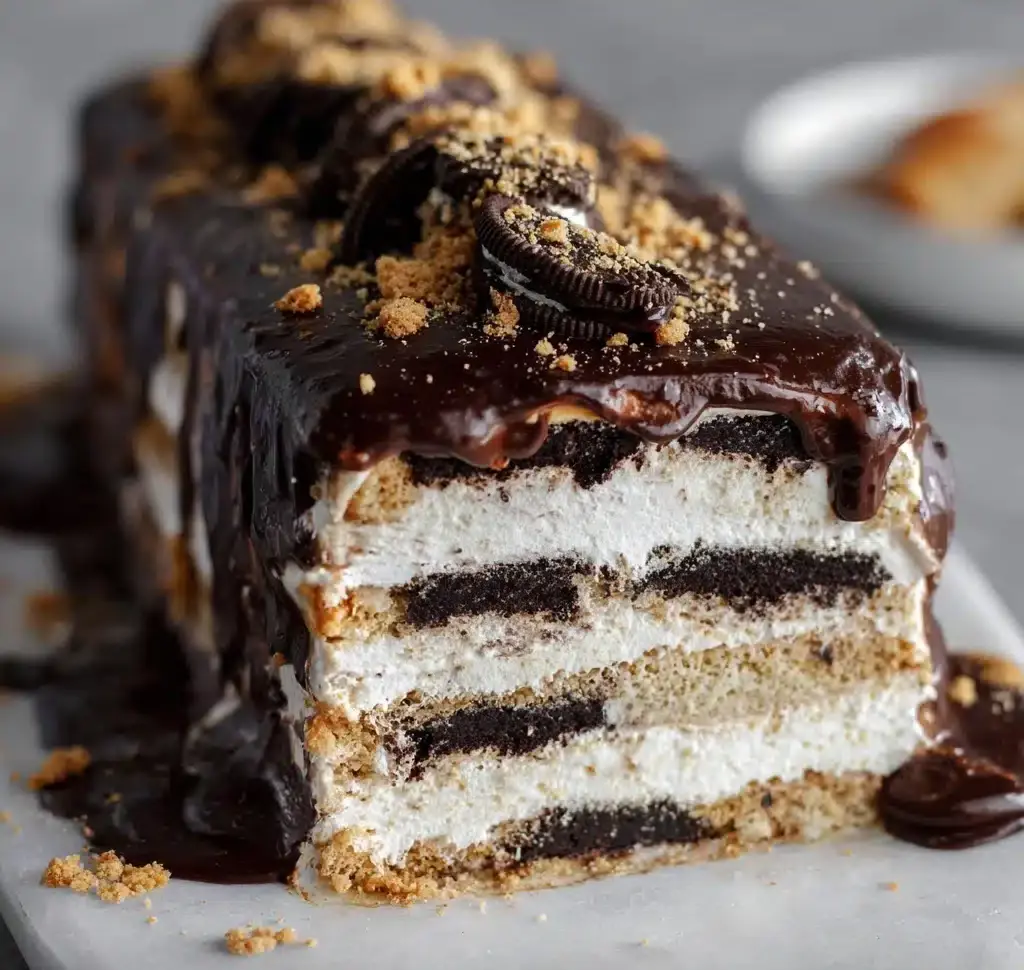
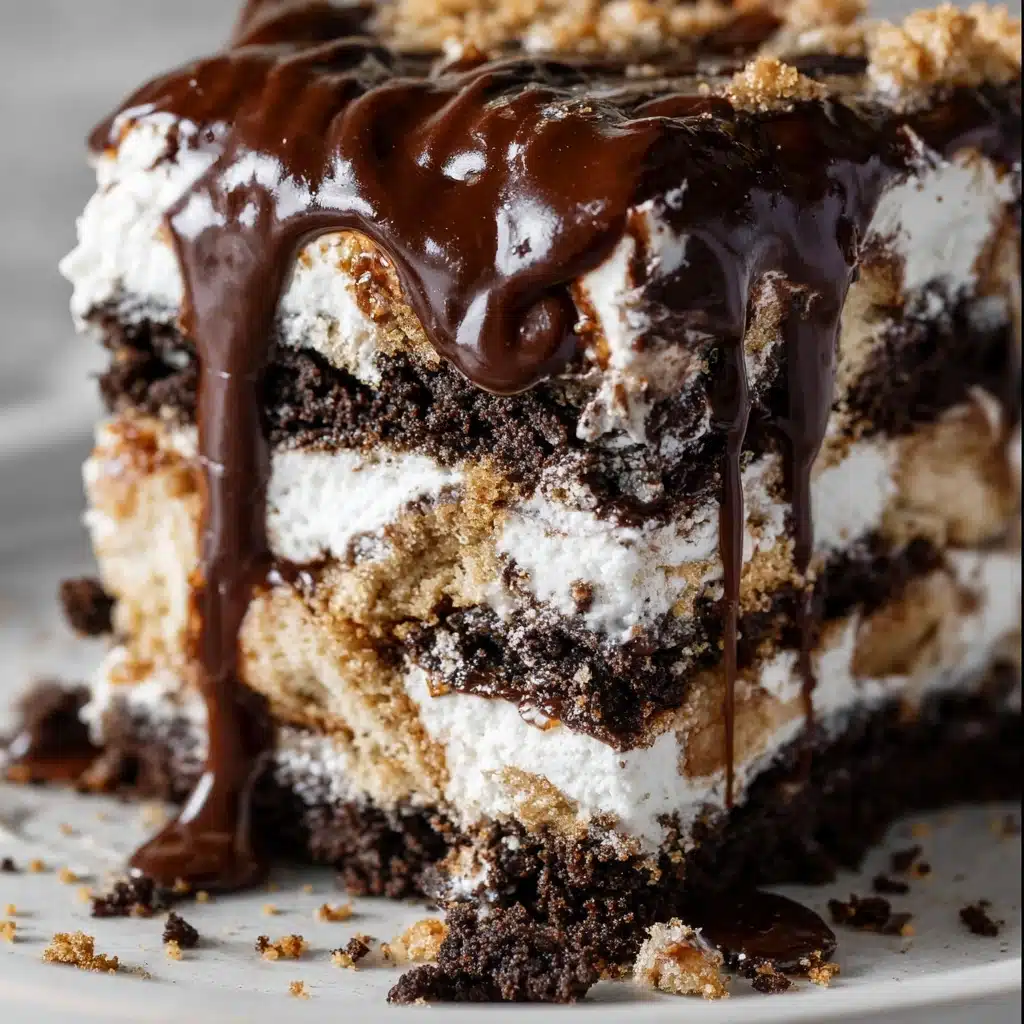
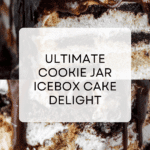
Cookie Jar Icebox Cake Recipe
Imagine a dessert that tastes just as magical as it looks: Cookie Jar Icebox Cake is a no-bake dream come true, perfect for delighting your inner child and showing off at any gathering. This cake layers creamy, cloud-like filling over classic cookies, chilling into a sliceable confection that blends crunch and silk in every bite. Each forkful will transport you straight to dessert heaven, with cookies and cream harmoniously mingling in the easiest, most irresistible way.
Ingredients You’ll Need
The beautiful thing about making Cookie Jar Icebox Cake is how just a handful of classic ingredients work together for incredible results. Each ingredient brings its own magic, with the cookies lending beloved flavors and the creamy filling pulling everything together for a show-stopping finish.
- Cream cheese (4 ounces, softened): Adds a creamy tang and essential richness that balances the sweetness of the cookies.
- Whipped topping (1 8-ounce tub): Fluffs up the filling, making it airy and light without any extra effort.
- Oreo cookies (20): Bring that unbeatable chocolate crunch and nostalgic flavor to every layer.
- Chips Ahoy cookies (16): Offer a contrasting, buttery sweetness and just a hint of chocolate chips for extra fun.
- Chocolate ganache and/or additional cookies for garnish (optional): Elevates the final look and taste, making every slice even more irresistible.
How to Make Cookie Jar Icebox Cake
Step 1: Prep the Creamy Filling
Start by placing the softened cream cheese in a mixing bowl. With a spoon or spatula, stir it until it becomes perfectly smooth and fluffy, which helps avoid any lumps in the filling.
Step 2: Fold in the Whipped Topping
Add about a quarter of your whipped topping to the cream cheese, blending until well combined. This lightens the cream cheese, so the rest of the whipped topping mixes in easily. Now, fold in the remainder until everything is dreamy and smooth. That’s your filling!
Step 3: Line the Loaf Pan
Take your 8×4 inch loaf pan and line it with plastic wrap, making sure it’s pressed into the corners and edges. This makes removing your Cookie Jar Icebox Cake a breeze when you’re ready to serve.
Step 4: Start Layering the Cake
Spread about two-thirds cup of the filling into the bottom of your prepared pan, smoothing it out so it covers the surface evenly. It’s the creamy pillow that starts your first cookie layer.
Step 5: Add Oreo Cookies
Lay 8 to 10 Oreo cookies over the filling, arranging them in a single, even layer. These cookies will soak up just enough moisture to become tender, while still holding their delightful crunch.
Step 6: Add More Filling and Chips Ahoy Cookies
Spread about half a cup of the creamy filling over the Oreos, then add your first layer of Chips Ahoy cookies—6 to 8 of them should fit in a single, cozy layer.
Step 7: Repeat the Cookie Layers
Keep the magic going by alternating layers: cover the Chips Ahoy cookies with more filling, add another layer of Oreos, then a layer of Chips Ahoy, and finish with all the remaining filling smoothed on top.
Step 8: Chill the Cake
Fold up the extra plastic wrap over the top and pop your masterpiece into the fridge for at least 8 hours (overnight is best). This gives the Cookie Jar Icebox Cake time to set and lets all those flavors mingle perfectly.
Step 9: Garnish and Serve
When you’re ready for dessert, lift the cake out of the pan and peel away the plastic. Drizzle with chocolate ganache and shower with extra cookie crumbs for a bakery-worthy finish. Slice and watch everyone swoon!
How to Serve Cookie Jar Icebox Cake
Garnishes
Classic chocolate ganache drizzled over the top is a dreamy upgrade, and a sprinkle of crushed cookies (both Oreo and Chips Ahoy, if you’re feeling fancy) adds a playful and showy touch. For extra pizzazz, try a swirl of whipped cream or a few chocolate curls right before serving.
Side Dishes
This nostalgic treat is plenty on its own, but it pairs beautifully with fresh berries for a fruity contrast or a scoop of vanilla ice cream for full-on indulgence. If you want something lighter, a big mug of coffee or milk on the side complements each sweet, creamy bite.
Creative Ways to Present
Think beyond the loaf! Try slicing your Cookie Jar Icebox Cake into small squares for a party platter, layering it into parfait glasses for individual servings, or even using mini loaf pans to gift adorable personal cakes. No matter how you serve it, the layers are always a showstopper.
Make Ahead and Storage
Storing Leftovers
Tightly wrap any remaining Cookie Jar Icebox Cake in plastic or transfer it to an airtight container. Store it in the refrigerator, where it will stay fresh and delicious for up to 4 days. The cookies get even softer and the flavors meld with each passing day!
Freezing
If you want to save your cake for later (or just like to be prepared for dessert emergencies), you can freeze it! Wrap individual slices or the whole cake well with plastic and then foil to prevent freezer burn. It’ll keep nicely for about 2 months. Thaw overnight in the fridge before serving.
Reheating
Luckily, Cookie Jar Icebox Cake is meant to be enjoyed cold, so there’s no need to reheat. Just bring it out of the fridge or let frozen portions thaw gently before slicing and serving. If the cake feels a bit firm, let it sit at room temperature for just a few minutes to soften up perfectly.
FAQs
Can I use homemade whipped cream instead of whipped topping?
Absolutely! Softly whipped homemade cream works beautifully in Cookie Jar Icebox Cake. Just be sure to stabilize it with a bit of powdered sugar so it holds up overnight.
What if I want to use different cookies?
Get creative! Any crunchy cookie will work—try graham crackers, Nutter Butters, or just about any store-bought favorite. Mixing and matching adds a fun twist every time.
Do I have to chill it for 8 hours?
Yes, chilling is crucial. The waiting game is hard, but it ensures the cookies soften just enough while the filling firms up into those satisfying, sliceable layers. It’s worth every minute!
Can I make Cookie Jar Icebox Cake in advance for a party?
You bet! In fact, making it a day ahead gives even better results. Just keep it chilled until you’re ready to garnish and serve.
Is there a gluten-free version?
You can easily make this gluten-free by choosing certified GF cookies and making sure your whipped topping and cream cheese are labeled gluten-free. The magic of Cookie Jar Icebox Cake is that it’s endlessly adaptable!
Final Thoughts
There’s something simply joyful about pulling together a Cookie Jar Icebox Cake and sharing it with friends and family. If you’re seeking a treat that’s as fun to make as it is to eat, don’t hesitate—gather your cookies and get ready for smiles all around. Give it a try, and let this no-bake beauty earn a guaranteed spot in your dessert rotation!
Print
Cookie Jar Icebox Cake Recipe
- Total Time: 8 hours 20 minutes
- Yield: 8 servings 1x
- Diet: Vegetarian
Description
Indulge in the deliciousness of this Cookie Jar Icebox Cake that requires no baking, just simple assembly and chilling. Layers of creamy filling, Oreo cookies, and Chips Ahoy cookies make this a delightful dessert for any occasion.
Ingredients
Cream Cheese Filling:
- 4 ounces cream cheese, softened
- 1 8-ounce tub whipped topping
Cookie Layers:
- 20 Oreo cookies
- 16 Chips Ahoy cookies
For Garnish (optional):
- Chocolate ganache
- Additional cookies
Instructions
- Make the Filling – Stir the softened cream cheese until smooth. Add whipped topping and combine until smooth.
- Line the Loaf Pan – Line an 8×4 inch loaf pan with plastic wrap, ensuring it covers the corners and edges.
- Assemble the Cake – Layer filling, Oreo cookies, and Chips Ahoy cookies in the pan.
- Refrigerate – Cover with plastic wrap and refrigerate for at least 8 hours.
- Garnish and Serve – Top with chocolate ganache and cookie crumbs before slicing and serving.
Notes
- For chocolate ganache, heat equal parts of cream and chocolate until melted and smooth.
- Prep Time: 20 minutes
- Cook Time: 0 minutes
- Category: Dessert
- Method: Chilling
- Cuisine: American
Nutrition
- Serving Size: 1 slice
- Calories: 320
- Sugar: 20g
- Sodium: 280mg
- Fat: 22g
- Saturated Fat: 12g
- Unsaturated Fat: 8g
- Trans Fat: 0g
- Carbohydrates: 30g
- Fiber: 1g
- Protein: 3g
- Cholesterol: 35mg
Keywords: Icebox Cake, No-Bake Dessert, Cookie Jar Cake

