
How to make soy milk Recipe
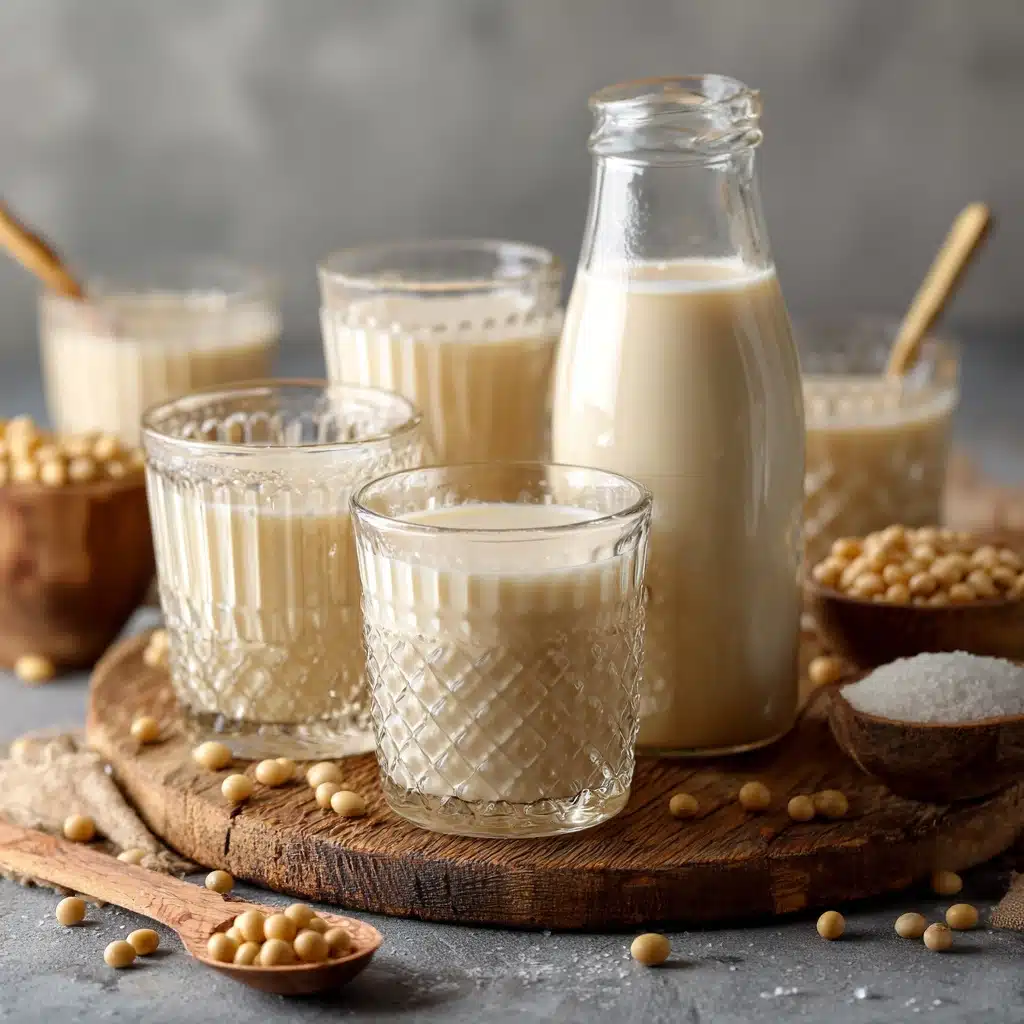
If you’ve ever wondered how to make soy milk at home, you’re in for a real treat. Homemade soy milk is incredibly fresh, naturally creamy, and you get to control everything from the sweetness to the thickness—perfect for your morning coffee, cereal, or a cozy cup all on its own. With just a handful of pantry staples and some simple steps, you’ll be pouring yourself a glass of soy milk that’s worlds better than anything you can buy in the store.

Ingredients You’ll Need
One of the best parts about learning how to make soy milk is just how simple the ingredients list is. Each element plays an important role—from giving body and creaminess to the final drink, to letting you adjust the flavor just how you like it.
- Dried soybeans: The star ingredient! These give your soy milk its signature flavor and creamy texture—look for beans that are evenly colored and free of blemishes.
- Water: Absolutely essential for hydrating the beans and blending everything together. Use filtered water for the cleanest taste.
- Salt (optional): Just a pinch is enough to highlight the nutty, full flavor of the soybeans.
- Sugar (optional): A touch of sweetness balances and rounds out the natural earthiness.
How to Make How to make soy milk
Step 1: Sort and Soak the Soybeans
The journey on how to make soy milk begins with the beans themselves. Sift through them carefully and pick out any that are shriveled or dark—they won’t bring much to the table. Rinse them well, then cover in plenty of cold water, letting them soak overnight or up to 24 hours. If your kitchen’s warm, tuck the bowl into the fridge to prevent any fermentation. When properly soaked, the beans will plump up beautifully—think of this step as the foundation for creamy, homemade soy milk.
Step 2: Drain, Rinse, and (Optional) Skin Removal
After soaking, drain away the water and give the beans a final rinse. Here’s a little bonus option: If you’re sensitive to “beany” flavors, you can remove the skins by rubbing the beans between your fingers—most of the skins will float for easy removal. While some say this step mellows the flavor, it’s totally up to you and your preferences as you get familiar with how to make soy milk just the way you like it.
Step 3: Prepare Your Strainer
Ahead of blending, get your filtering station ready. Place a strainer lined with cheesecloth, muslin, or even a sturdy coffee filter atop a large, heatproof bowl or pot. This setup will make straining your homemade soy milk much tidier, capturing all the pulp while letting the creamy liquid through.
Step 4: Blend the Soybeans with Water
Now it’s time to blend! Add the soaked beans and 4 cups of fresh water to a high-speed blender. Blend until smooth and creamy—this breaks down the beans and releases all their flavor and richness. If your blender is on the smaller side, just split the batch and blend with 2 cups water each time; just make sure all the beans get thoroughly blended for ultra-smooth soy milk.
Step 5: Cook the Soy Milk Mixture
Pour the blended mixture into your tallest pot and stir in 3 more cups of water. Cook over medium-high heat, stirring constantly with a wooden spatula to prevent sticking or burning. When you see it start to boil, reduce the heat to medium-low and set a timer for 20 minutes. The foam will rise as the milk cooks, so keep an eye on it—if it threatens to spill over, lower the heat and stir until it settles. Constant stirring is the key to clean, fresh-tasting soy milk.
Step 6: Strain and Finish
Once the cooking time is up, turn the heat off and stir for another minute. Slowly pour the hot mixture through your cheesecloth-lined strainer. Use a spatula to press out every last drop of liquid—you’re left with silky, homemade soy milk on one side, and okara (soy pulp) on the other. Gather up the pulp, squeeze it well for every bit of milk, and then season with a pinch of salt or sugar to highlight the delicate, nutty flavor. That’s it; you’ve just mastered how to make soy milk from scratch!
How to Serve How to make soy milk
Garnishes
The simplest way to enjoy your fresh batch is with just a little extra sweetness—a swirl of honey, maple syrup, or a dusting of cinnamon works wonders. If you’re serving it warm, a pinch of freshly grated nutmeg can add a cozy touch. Try topping chilled soy milk with a few ice cubes for a refreshing drink or a scatter of toasted black sesame seeds for an earthy twist.
Side Dishes
Wondering what pairs beautifully alongside? Homemade soy milk is a classic companion to Asian pastries like steamed buns, sesame balls, or scallion twists. Try serving it with a slice of toasted milk bread for breakfast or a platter of fresh fruit and granola for a light lunch. When exploring how to make soy milk at home, you’re also opening the doors to endless pairing possibilities!
Creative Ways to Present
Soy milk isn’t just a drink—it can also be a base for smoothies, lattes, or even homemade tofu. Pour into pretty glass bottles as edible gifts, or offer a DIY soy milk bar at brunch where guests can flavor their own cups. Some people also enjoy incorporating it into Asian soups or baking recipes, so don’t be afraid to get creative with your newfound skill in how to make soy milk.
Make Ahead and Storage
Storing Leftovers
Fresh soy milk will keep in the refrigerator for up to 4 days. Use a clean, airtight container and give the milk a good shake before each use—some natural separation is totally normal. Because you’ve made this from scratch, there’s no preservatives, so it tastes best within the first couple of days.
Freezing
If you want to make a larger batch, soy milk can be frozen. Pour it into freezer-safe containers, leaving some space at the top for expansion. When you thaw it overnight in the fridge, you might notice a bit of separation—just give it a strong shake or a blend, and the texture will come right back.
Reheating
Warming up homemade soy milk on the stovetop is easy: heat gently over low-to-medium heat, stirring occasionally. Avoid boiling it again to preserve the delicate flavors and smoothness. Whether you’re using your soy milk in a latte, as a creamy soup base, or simply sipping it warm, gentle heat is all you need.
FAQs
Can I use any type of soybeans for this recipe?
For the best results on how to make soy milk, use dried, light beige soybeans specifically intended for cooking—avoid ones that are old or have been sitting around, as their flavor can be dull. Organic or non-GMO soybeans are excellent choices if you’re looking for even cleaner flavor.
Is it necessary to remove the soybean skins?
While some people believe removing the skins reduces the “beany” taste, it’s completely optional. After experimenting with both methods as part of how to make soy milk, you may find the difference to be subtle, so feel free to skip this step if you’re short on time.
Can I adjust the sweetness level?
Absolutely! That’s the beauty of knowing how to make soy milk from scratch. Add sugar, honey, or any sweetener you like to taste. You can also keep it unsweetened and add flavors individually for each use.
What can I do with the leftover okara?
Don’t throw out that soybean pulp! Okara is a rich, nutritious by-product you get when learning how to make soy milk. Use it in baking, add to veggie burgers, or even stir into oatmeal for extra protein and fiber.
Is homemade soy milk suitable for coffee or tea?
Definitely. Because you control thickness and sweetness, homemade soy milk is a fabulous addition to lattes, tea, or smoothies. If you enjoy frothy drinks, try using slightly less water for a richer texture that will steam and foam beautifully.
Final Thoughts
Once you’ve learned how to make soy milk at home, you might never look at store-bought the same way again. It’s a wonderfully satisfying process that fills your kitchen with warmth and gives you fresh, wholesome milk exactly how you want it. Give it a try—you’ll be amazed at the difference, and you might even start inspiring others to join you on the homemade soy milk journey!
Print
How to make soy milk Recipe
- Total Time: 24 hours 30 minutes
- Yield: Approximately 8 cups 1x
- Diet: Vegetarian
Description
Learn how to make delicious and nutritious soy milk right at home with this easy recipe. Enjoy the pure taste of soybeans in every creamy sip!
Ingredients
Soy Milk:
- 8 oz / 226 g (1 1/4 cup) dried soybeans
- 7 cups water, divided
- Pinch of salt and/or sugar, to taste (Optional)
Instructions
- Pick and Rinse Beans: Pick through soybeans, removing any damaged ones. Rinse thoroughly and soak in water for up to 24 hours.
- Drain and Skin Beans: Drain soaked beans, optionally remove skins, and rinse once more.
- Prepare Strainer: Set up a strainer lined with cheesecloth over a vessel.
- Blend Soybeans: Blend soybeans with 4 cups of water until smooth.
- Cook Soy Milk: Transfer mixture to a pot, add 3 cups water, heat, and stir until boiling. Simmer for 20 minutes.
- Strain Soy Milk: Pour mixture over the lined strainer to filter out okara.
- Season and Enjoy: Add salt and/or sugar to taste and sweeten further if desired.
Notes
- You can store the soy milk in a sealed container in the refrigerator for up to 4 days.
- Okara, the leftover pulp, can be used in various recipes like veggie burgers or smoothies.
- Prep Time: 24 hours
- Cook Time: 30 minutes
- Category: Beverage
- Method: Cooking
- Cuisine: Asian
Nutrition
- Serving Size: 1 cup (240ml)
- Calories: 80
- Sugar: 1g
- Sodium: 50mg
- Fat: 4g
- Saturated Fat: 0.5g
- Unsaturated Fat: 3g
- Trans Fat: 0g
- Carbohydrates: 6g
- Fiber: 1g
- Protein: 7g
- Cholesterol: 0mg
Keywords: soy milk recipe, homemade soy milk, soybeans, dairy-free milk


