
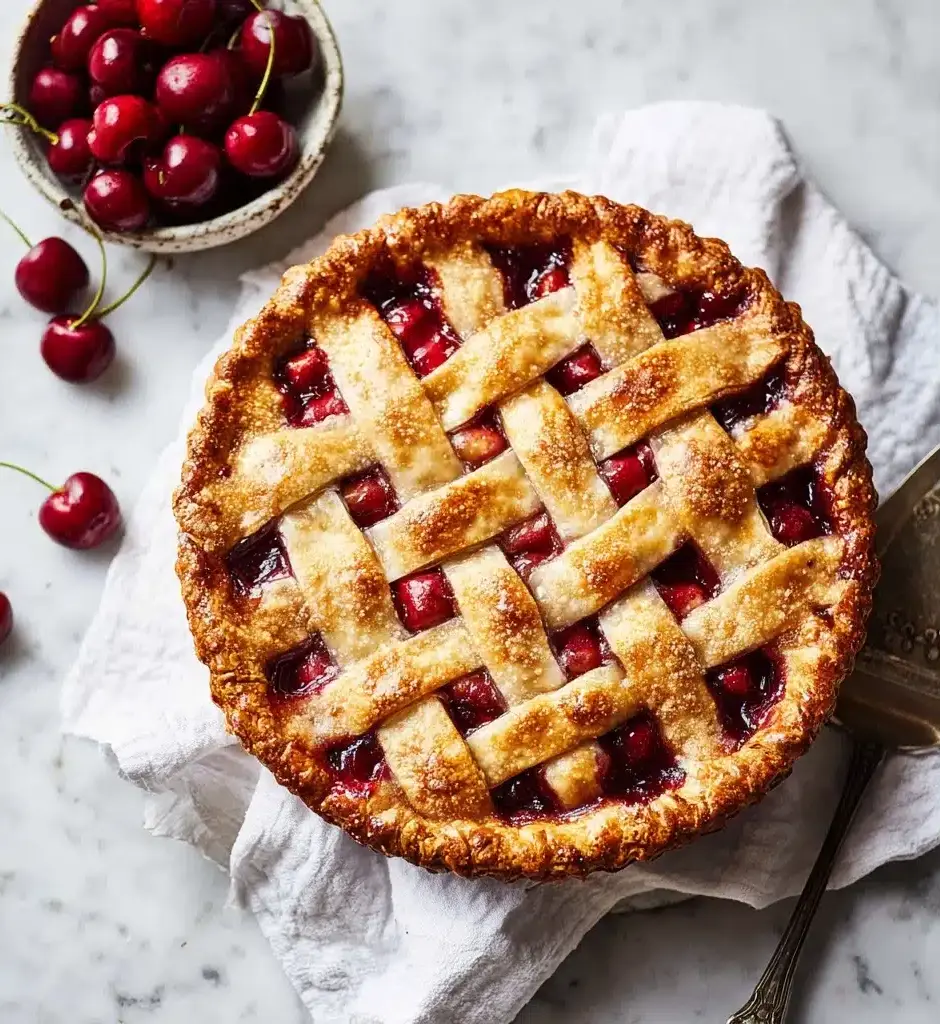
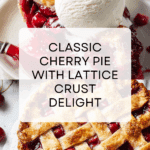
Cherry Pie Recipe
There is something irresistibly nostalgic and downright joyful about a freshly baked Cherry Pie. From its flaky, golden crust to the irresistible blend of sweet-tart cherries shimmering under a beautiful lattice, this classic dessert never fails to spark smiles and gather loved ones to the table. It’s a recipe that delivers a burst of summer flavor any time of year, whether you’re baking for a holiday or simply treating yourself to a well-deserved slice of comfort.
Ingredients You’ll Need

Ingredients You’ll Need
Making a great Cherry Pie starts with simple, high-quality ingredients—each one playing its part, from buttery crust to juicy filling. Trust me, these elements truly make the pie sing with flavor, texture, and that unbeatable homemade feel.
- All purpose flour: The foundation for a tender, flaky crust that holds its shape and soaks up just the right amount of cherry juice.
- Ice water: Keeps the pie dough cool, which is the secret to keeping that butter flaky and deliciously layered.
- Cold butter (cubed): Gives your crust its melt-in-your-mouth quality and those magical golden pockets.
- Pinch of salt: Don’t skip it! A touch of salt balances all the sweetness and enhances the depth of the crust.
- Canned sour cherries: These gems provide that signature tart-sweet cherry flavor and a gorgeous color—every bite is blissful.
- Cane sugar (or plain sugar): Essential for sweetening the filling and helping the cherries’ natural flavors shine through.
- Lemon juice: Adds a gentle zing, brightening up the entire pie and making each forkful lively.
- Cornstarch: Makes for a glossy, perfectly thick cherry filling that won’t drip all over your plate.
- Unsalted butter: Melted into the filling, it delivers richness and depth you can taste in every bite.
- Almond extract: A splash of this brings out the best in cherries and gives your pie that delicate, aromatic lift.
- Egg white (beaten): The finishing touch for a shiny, lightly crisped pie crust that looks as good as it tastes.
How to Make Cherry Pie
Step 1: Prepare the Pie Dough
Let’s start at the very foundation—homemade dough! Pulse together flour and salt in your food processor, then blend in the cold, cubed butter until the mixture looks like coarse meal. Slowly pour in the ice water while the processor is running. Stop when the dough just comes together. Divide the dough into two equal discs, wrap them up, and let them chill for at least an hour. That chill time is our secret weapon for a flaky, tender crust every time!
Step 2: Prepare the Cherry Filling
Now for the heart of the pie—the filling. Drain the juice from your canned sour cherries into a saucepot, reserving about a third of a cup in a separate bowl. Whisk this reserved juice with cornstarch and almond extract, making a smooth thickener. Meanwhile, add sugar to the juice in the saucepot. Bring this mixture to a boil, then drop the heat and simmer until the sugar dissolves. Whisk in the cornstarch mixture and let it gently thicken for a couple of minutes. Stir in the lemon juice, cherries, and a couple of tablespoons of butter, letting everything melt together. Let this filling cool—it smells so amazing, you’ll be tempted to spoon some straight from the pot!
Step 3: Assemble the Cherry Pie
Preheat your oven to 400°F and dust your surface with flour. Roll one disc of pie dough just a little larger than your pie pan and nestle it gently into place, trimming the edges if needed. Pour in your cooled cherry filling and marvel at that luscious color! Roll out your second dough disc, slice it into ½-inch wide strips, and create a classic lattice: weave them over your filling for that signature Cherry Pie look. Finally, brush everything with egg white for a gorgeous, shiny crust.
Step 4: Bake to Perfection
Pop your masterpiece in the oven and bake for about 40 minutes. At the halfway point (after 20 minutes), peek at your pie. If it’s browning quickly, tent it with foil to prevent burning. The aroma will fill your kitchen with warmth and anticipation!
Step 5: Cool and Slice
Once baked to deep golden perfection, remove your Cherry Pie from the oven and let it cool completely. This wait is worth it—the filling will set beautifully, making each slice picture-perfect. Now it’s ready to serve and enjoy!
How to Serve Cherry Pie
Garnishes
A scoop of vanilla ice cream melting over a warm slice of Cherry Pie is a vision of pure happiness. Or, try a cloud of sweetened whipped cream and a sprinkle of toasted almonds to echo the almond extract in the filling. For a grown-up twist, a drizzle of cherry liqueur or even a dusting of powdered sugar adds instant elegance.
Side Dishes
Pair your Cherry Pie with light, fresh sides that let it shine: a salad of sliced oranges and mint cuts the richness, while a platter of cheeses (think Brie or mascarpone) adds creamy contrast. Hot or iced coffee, or a tangy citrus tea, makes the whole slice-and-sip experience even more luxurious.
Creative Ways to Present
For a party, consider baking your Cherry Pie in individual tart pans or muffin tins for adorable, personal-sized treats. Or make a rustic galette if you’re craving a free-form approach. Dress up slices with edible flowers or serve them in mason jars for a playful picnic-ready twist!
Make Ahead and Storage
Storing Leftovers
Have extra Cherry Pie? Lucky you! Simply wrap slices tightly in plastic wrap or place them in an airtight container. Store in the refrigerator for up to three days, keeping that crust flaky and the filling fresh.
Freezing
For longer storage, Cherry Pie freezes beautifully. Wrap the whole cooled pie or individual slices in foil and then plastic wrap, and freeze for up to three months. Defrost overnight in the fridge before serving or reheating.
Reheating
To warm up leftovers and recapture that just-baked magic, place a whole pie or slices on a baking sheet and reheat in a 325°F oven for 10 to 15 minutes. This keeps the crust crisp and the filling lusciously gooey.
FAQs
Can I use fresh cherries instead of canned?
Absolutely! Pit and halve about 2½ pounds of fresh sour cherries and proceed as directed. You may need to adjust the sugar slightly, depending on how tart your cherries are.
What’s the secret to a flaky crust?
Keep your ingredients—and especially your butter—as cold as possible, handle the dough as little as you can, and let it rest in the fridge before rolling out. Those tender flaky layers are all about keeping that butter from melting too soon.
How do I prevent my Cherry Pie from being too runny?
Draining the cherries and using cornstarch as a thickening agent are crucial. Allow the pie to cool completely before slicing so the filling has time to set and isn’t soupy when you cut in.
Can I make the dough ahead of time?
Definitely! Pie dough can be made up to three days ahead and kept wrapped in the refrigerator. For longer storage, freeze the dough discs and thaw overnight before using.
Is it possible to make Cherry Pie gluten-free?
Yes, you can substitute your favorite gluten-free flour blend for the all-purpose flour in both the crust and the filling. Just be sure to use a blend that’s meant for baking to achieve the right texture.
Final Thoughts
Whether you’re baking for a special occasion or simply chasing a taste of nostalgia, making Cherry Pie from scratch truly captures the joy of sharing something handmade and heartfelt. I hope you give this recipe a try—one bite, and you’ll see why it’s a forever favorite in my kitchen!
Print
Cherry Pie Recipe
- Total Time: 1 hour 40 minutes
- Yield: 1 9-inch pie 1x
- Diet: Vegetarian
Description
Indulge in the sweet and tangy flavors of this classic Cherry Pie. With a buttery, flaky crust and a luscious cherry filling, this dessert is a crowd-pleaser for any occasion.
Ingredients
Pie Dough:
- 2½ cups all-purpose flour
- ¼ cup ice water
- 1 cup cold butter (cubed)
- pinch of salt
Filling:
- 42 ounces canned sour cherries
- ¾ cup cane sugar (or plain sugar)
- 1½ tablespoons lemon juice
- ⅓ cup cornstarch
- 2 tablespoons unsalted butter
- ¼ teaspoon almond extract
- 1 egg white (beaten)
Instructions
- Prepare the Pie Dough: Combine the ingredients. In the bowl of a food processor, pulse together flour and salt. Add butter and process until it resembles coarse meal.
- Bring the dough together: While the machine is running, gradually add cold water. Process until the dough comes together. Divide the dough into two parts and flatten them into discs. Wrap the dough and chill for 1 hour before rolling out.
- Prepare the Filling: Drain the juice. Drain the juice from the cherries into a saucepot. Take 1/3 cup of the juice and add it to a bowl.
- Make the thickener: Whisk the reserved cherry juice (in the bowl) with cornstarch and almond extract. Set aside.
- Make the filling: Add the sugar to the cherry juice in the saucepot. Bring to a boil, then reduce heat. Simmer until the sugar dissolves. Stir in the cornstarch mixture and simmer for 2-3 minutes or until gently thickened. Stir in the lemon juice, cherries, and butter. Allow the butter to melt, and allow the cherry filling to cool down.
- Assemble the Pie: Prep. Preheat the oven to 400°F. Set aside a 9-inch pie pan.
- Roll out the dough: Roll the pie dough out on a floured surface, making one part slightly larger than the pie pan. This will allow you to cover the pie pan sides with the dough. Transfer the dough into the pie pan and crimp the edge if you like.
- Fill the pie: Add the cooled cherry filling over the pie crust.
- Add the top crust: Roll the second piece of dough. Using a pizza cutter, cut the dough into ½-inch strips. Lay the dough strips over the pie filling in a lattice pattern.
- Add an egg wash: Brush the pie dough with beaten egg white.
- Bake: Bake the pie for 40 minutes. Make sure to check the pie after 20 minutes. If the pie is browning too fast, cover the pie with a piece of aluminum foil.
- Cool and serve: Remove the cherry pie from the oven and let it cool completely before slicing and serving.
- Prep Time: 1 hour
- Cook Time: 40 minutes
- Category: Dessert
- Method: Baking
- Cuisine: American
Nutrition
- Serving Size: 1 slice
- Calories: 320
- Sugar: 20g
- Sodium: 180mg
- Fat: 15g
- Saturated Fat: 9g
- Unsaturated Fat: 5g
- Trans Fat: 0g
- Carbohydrates: 45g
- Fiber: 2g
- Protein: 3g
- Cholesterol: 40mg
Keywords: Cherry Pie, Dessert, Pie Recipe, Homemade Pie
