
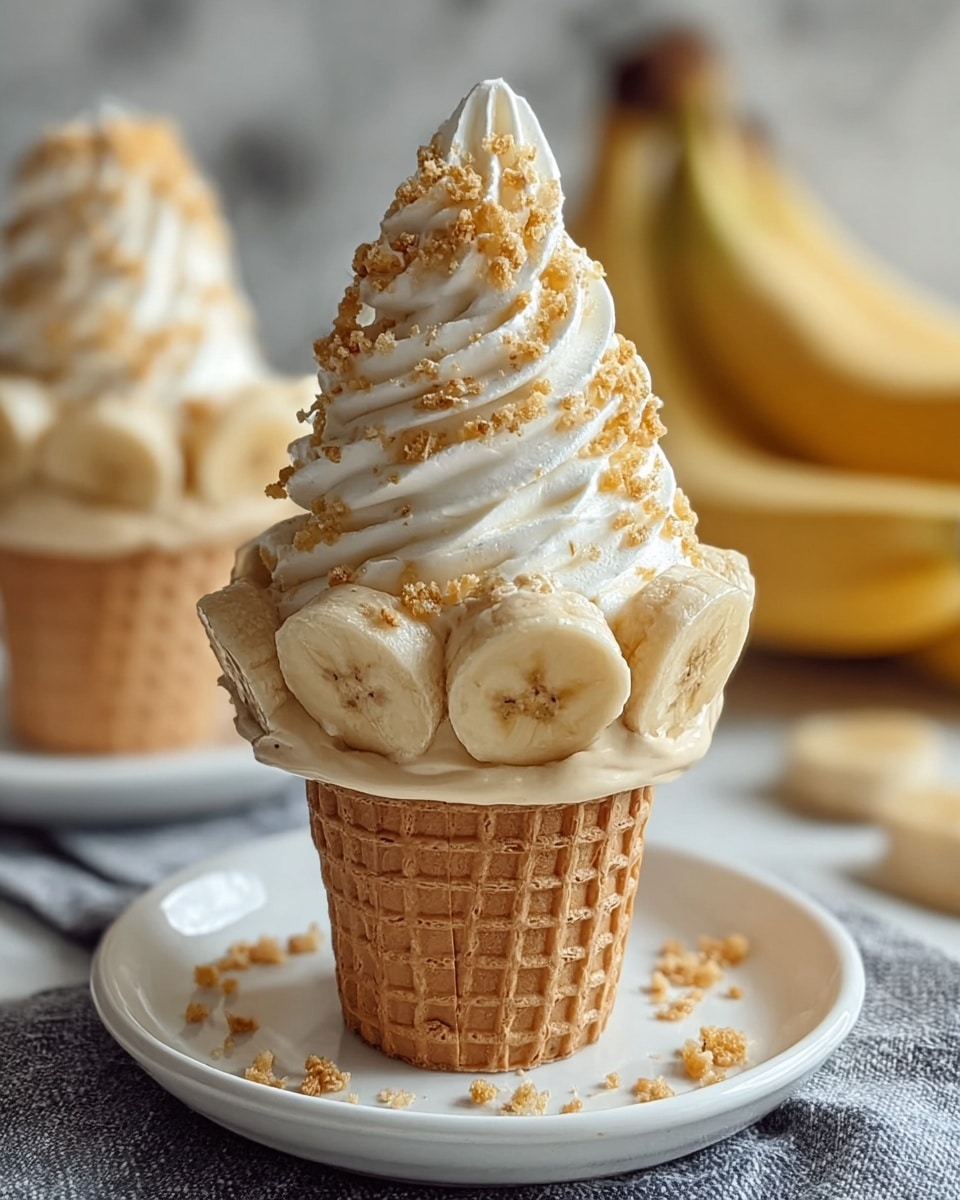
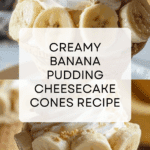
Banana Pudding Cheesecake Cones Recipe
Introduction
Banana Pudding Cheesecake Cones are a delightful twist on classic desserts, combining creamy cheesecake, banana pudding, and crunchy waffle cones. This handheld treat is perfect for summer parties or anytime you want a fun and tasty dessert.

Ingredients
- 8 oz cream cheese (softened)
- 1/2 cup powdered sugar (sifted)
- 1 tsp vanilla extract (pure)
- 1/2 cup heavy whipping cream (cold)
- 1/2 package instant banana pudding mix (3.4 oz size)
- 1/2 cup cold milk
- 6 waffle cones (standard size)
- 2 ripe bananas (sliced)
- 1 cup crushed vanilla wafers
- 1 cup whipped topping
- 2 tbsp caramel sauce (optional)
Instructions
- Step 1: In a mixing bowl, beat the cream cheese, powdered sugar, and vanilla extract until smooth and creamy.
- Step 2: In a separate bowl, whisk together the instant banana pudding mix and cold milk. Let it sit for 5 minutes until thickened.
- Step 3: Gently fold the pudding mixture into the cream cheese mixture until fully combined.
- Step 4: Fold in the heavy whipping cream until the filling is light and fluffy.
- Step 5: Optionally, coat the inside of each waffle cone with a thin layer of melted chocolate to prevent sogginess.
- Step 6: Spoon or pipe a layer of the cheesecake filling into each cone, add a layer of crushed vanilla wafers and sliced bananas, then repeat until the cone is filled.
- Step 7: Top each cone with whipped topping, a drizzle of caramel sauce if desired, and extra crushed vanilla wafers.
- Step 8: Serve immediately and enjoy!
Tips & Variations
- For an extra chocolatey touch, use chocolate-dipped waffle cones or drizzle melted chocolate on top.
- Substitute fresh strawberries or other fruits for bananas to customize flavors.
- Chill the filled cones in the refrigerator for 30 minutes if you prefer a firmer texture before serving.
- Use a piping bag for neat and even layers inside the cone.
Storage
These cheesecake cones are best eaten fresh to maintain the crispiness of the waffle cones. If storing, keep them covered in the refrigerator and consume within 1-2 days. Note that the cones may become soggy after refrigeration. Reheat is not recommended.
How to Serve
Serve this delicious recipe with your favorite sides.
FAQs
Can I prepare these cones ahead of time?
You can assemble the filling in advance, but it’s best to fill the cones just before serving to keep them crisp.
Can I use regular pudding instead of instant banana pudding mix?
Instant pudding mix works best for this recipe because it sets quickly and blends well. Regular pudding may be too soft and affect the texture of the filling.
Print
Banana Pudding Cheesecake Cones Recipe
- Total Time: 20 minutes
- Yield: 6 cones 1x
Description
These Banana Pudding Cheesecake Cones are a delightful handheld dessert combining creamy cheesecake filling with classic banana pudding flavors, layered with fresh bananas and crunchy vanilla wafers inside crispy waffle cones. Perfect for an easy-to-serve treat that requires no baking and can be assembled quickly for parties or family gatherings.
Ingredients
Cheesecake Filling
- 8 oz cream cheese, softened
- 1/2 cup powdered sugar, sifted
- 1 tsp pure vanilla extract
- 1/2 cup heavy whipping cream, cold
Banana Pudding Mixture
- 1/2 package instant banana pudding mix (3.4 oz size)
- 1/2 cup cold milk
Assembly
- 6 standard size waffle cones
- 2 ripe bananas, sliced
- 1 cup crushed vanilla wafers
- 1 cup whipped topping
- 2 tbsp caramel sauce (optional)
Instructions
- Prepare the Cheesecake Filling: In a mixing bowl, beat the softened cream cheese, powdered sugar, and vanilla extract together until smooth and creamy with no lumps.
- Make the Banana Pudding: In a separate bowl, whisk the instant banana pudding mix with cold milk. Let it sit for about 5 minutes to thicken into a pudding consistency.
- Combine Mixtures: Gently fold the thickened banana pudding into the cream cheese mixture until fully combined and well blended.
- Add Whipped Cream: Fold the cold heavy whipping cream into the combined mixture until the filling becomes light and fluffy.
- Prepare Cones: Optionally, coat the inside of each waffle cone with a thin layer of melted chocolate to help prevent sogginess and add flavor.
- Assemble Layers: Spoon or pipe a layer of the cheesecake filling into each waffle cone, then add a layer of crushed vanilla wafers followed by sliced bananas. Repeat the layering until the cones are filled to the top.
- Finish Toppings: Top each filled cone with whipped topping, a drizzle of caramel sauce if desired, and sprinkle extra crushed vanilla wafers on top for added texture and decoration.
- Serve: Serve the Banana Pudding Cheesecake Cones immediately for best texture and freshness. Enjoy this no-bake, easy-to-make dessert!
Notes
- Using cold heavy cream helps achieve a fluffier cheesecake filling.
- Coating cones with melted chocolate is optional but helps maintain a crisp texture longer.
- These cones are best served fresh to avoid sogginess from the filling.
- You can substitute whipped topping with homemade whipped cream if preferred.
- For a gluten-free option, use gluten-free waffle cones and gluten-free vanilla wafers.
- Prep Time: 20 minutes
- Cook Time: 0 minutes
- Category: Dessert
- Method: No-Cook
- Cuisine: American
Keywords: banana pudding cheesecake cones, no bake dessert, waffle cone dessert, banana dessert, cheesecake filling, easy party dessert
