
A Sweet and Festive Way to Celebrate! Recipe
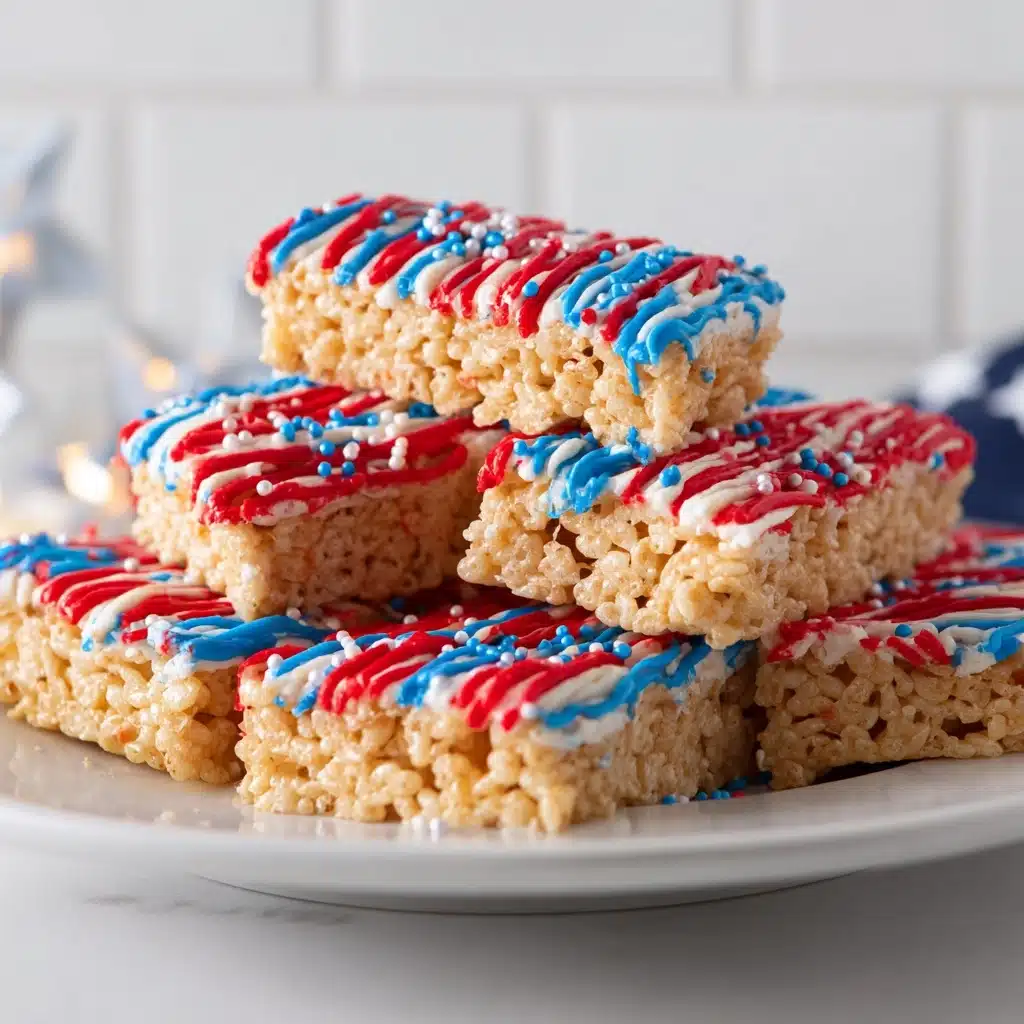
Bursting with playful colors and nostalgic flavor, these Independence Rice Krispie Treats are truly A Sweet and Festive Way to Celebrate! Imagine the classic gooey marshmallow bars you loved as a kid, now decked out in bold red, white, and blue. With melt-in-your-mouth candy drizzles and a shower of sprinkles, these treats aren’t just delicious—they’re a showstopper at any party or picnic. Whether you’re celebrating a holiday or just craving something fun, this recipe is sure to put a giant smile on everyone’s face!
Ingredients You’ll Need
Gather just a few pantry staples and some eye-catching meltable candies—simple, colorful, and absolutely essential! Each ingredient plays a specific role in making these bars extra gooey, sweet, and unmistakably festive.
- Rice Krispies cereal: The star of the show, it gives our treats that signature crunch and lightness.
- Butter: Adds rich flavor and helps melt everything together for an irresistibly smooth texture.
- Mini marshmallows: Make the base sweet, gooey, and perfectly chewy—be sure to use fresh marshmallows for the best melt!
- Red meltable candies: Bring the first pop of color; melt easily and add a subtle vanilla sweetness.
- White meltable candies: The classic touch that makes each square look festive and bright.
- Blue meltable candies: Round out the trio for a truly celebratory look (and a hint of creamy flavor).
- Sprinkles: Use your favorites—stars, jimmies, or nonpareils—for extra crunch and dazzling flair!
How to Make A Sweet and Festive Way to Celebrate!
Step 1: Melt the Butter and Marshmallows
Start by melting the butter in a large pot over low heat. When completely melted, toss in all your mini marshmallows. Stir constantly so nothing burns, and watch as they slowly turn into a smooth, glossy, oh-so-inviting mixture.
Step 2: Mix in the Cereal
With the heat off, quickly pour in all of the Rice Krispies cereal. Use a sturdy spatula to really fold the cereal into the marshmallow blend, making sure every little crisp gets coated in sweet, sticky goodness for a truly uniform flavor.
Step 3: Press and Shape
Transfer the mixture into a 9×13 inch pan lined with parchment or lightly greased. Press down firmly using lightly buttered hands or the back of a spatula, smoothing it into an even layer—this ensures neat bars later and that every bite is perfectly dense.
Step 4: Chill to Set
Pop the whole pan into the refrigerator for at least an hour. Chilling is your secret weapon! It helps the bars set up so they cut easily and hold their shape, while keeping all that gooey texture locked in.
Step 5: Cut into Bars
Once firm, gently lift the cooled slab out using the parchment. Set it on a cutting board and slice into as many festive squares or rectangles as your heart desires—big pieces for extra fun, or minis for snack platters.
Step 6: Melt the Candy Coatings
In separate microwavable bowls, melt the red, white, and blue meltable candies, following the package directions. Make sure your bowls are deep enough for easy drizzling, and stir each color until silky smooth.
Step 7: Drizzle with Color
Now the fun starts! Take a spoon (or a piping bag if you feel fancy) and drizzle stripes of each melted candy over the squares. Let the colors overlap for a true A Sweet and Festive Way to Celebrate! look, or create bold blocks for a striking effect.
Step 8: Add Sprinkles
While the candy is still wet, sprinkle generously with your chosen decorations. This step is pure joy—get creative with star-shaped sprinkles or stick to classic rainbow jimmies for a pop that matches your party mood.
Step 9: Let Them Set
Allow your Rice Krispie treats to sit out at room temperature until the candy sets, or use the refrigerator if you’re in a hurry. Once everything is firm, they’re ready to serve for the ultimate sweet and festive treat!
How to Serve A Sweet and Festive Way to Celebrate!
Garnishes
Add a final flourish by piling on extra sprinkles just before serving, or even nestle edible glitter stars on top. Ribbons tied around each bar can turn them into party favors, making every bite truly A Sweet and Festive Way to Celebrate!
Side Dishes
Pair these bars with simple vanilla ice cream, fresh berries, or a light citrus fruit salad—their cool, refreshing flavors perfectly balance the sweetness, making your dessert table a total crowd-pleaser.
Creative Ways to Present
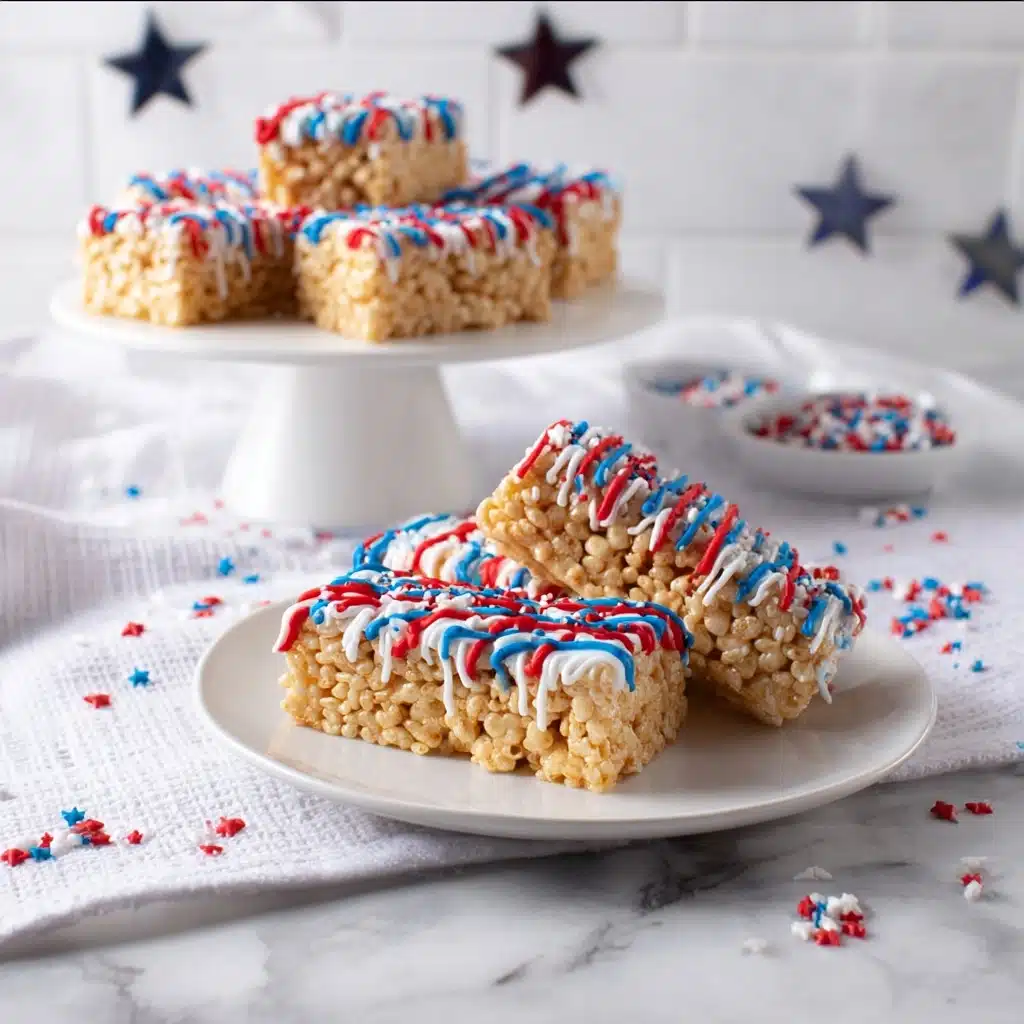
Display these treats on a tiered cake stand, or skewer each one onto popsicle sticks for a portable A Sweet and Festive Way to Celebrate! You can even stack them in alternating colors for a flag-inspired centerpiece at your next picnic or event.
Make Ahead and Storage
Storing Leftovers
Wrap leftover bars tightly in plastic wrap or transfer them to an airtight container. They stay fresh at room temperature for up to three days—ideal for prepping in advance or packing into lunchboxes for a sweet and festive pick-me-up!
Freezing
Yes, you can freeze these treats! Simply place the bars in a single layer on a baking sheet until firm, then stack in a freezer-safe container separated by wax paper. They’ll keep for up to two months, so you can have A Sweet and Festive Way to Celebrate! ready at a moment’s notice.
Reheating
If you prefer your bars extra gooey, a short 10-second zap in the microwave will do the trick. For the best texture, thaw frozen bars at room temperature—any longer and the candy drizzle might sweat, so plan ahead for perfectly festive results.
FAQs
Can I use large marshmallows instead of mini marshmallows?
Absolutely! Just chop them up a bit to help them melt evenly. Since larger marshmallows melt slower, give them a little extra time and stir constantly for the perfect gooey base.
What if I can’t find red, white, and blue meltable candies?
No problem—use white chocolate or almond bark and add food coloring gels to match your theme. You could also use colored icing, candy melts in any available shade, or even leave off the drizzle for classic bars.
How do I cut neat squares without sticking?
It helps to let the bars cool and set well beforehand. Use a sharp, non-serrated knife, and wipe between slices. A little nonstick spray on your knife or using parchment paper as a sling both make things even simpler!
Can I make these treats dairy free?
Yes! Swap in plant-based butter and check your marshmallow and candy products for dairy-free certification. There are also vegan-friendly marshmallows and candy melts available in most supermarkets or online.
Why are my Rice Krispie treats hard instead of chewy?
The secret is low heat. Melting your marshmallows too quickly or at a high temperature can make the sugar seize up and turn rock solid. Take your time and work low and slow for that signature chewy delight.
Final Thoughts
If you’re looking for a treat that sparkles with color, tastes like childhood, and turns any get-together into A Sweet and Festive Way to Celebrate!, these Independence Rice Krispie Treats are your answer. Gather your friends and family and enjoy every nostalgic, colorful bite!
Print
A Sweet and Festive Way to Celebrate! Recipe
- Total Time: 1 hour 30 minutes
- Yield: 12–16 treats 1x
- Diet: Vegetarian
Description
Celebrate Independence Day with these festive and colorful Independence Rice Krispie Treats. These sweet and crunchy treats are perfect for adding a patriotic flair to your holiday festivities.
Ingredients
For the Rice Krispie Treats:
- 5 cups rice Krispies cereal
- ¼ cup butter
- 4 cups mini marshmallows (about 10 ounces)
For Decorating:
- ½ cup red meltable candies
- ½ cup white meltable candies
- ½ cup blue meltable candies
- Sprinkles, as desired
Instructions
- Melt the butter: In a large pot, melt the butter over low heat. Add the mini marshmallows and stir until completely melted and smooth.
- Add cereal: Remove from heat and mix in the Rice Krispies cereal until well coated.
- Press into pan: Press the mixture into a 9×13 inch pan lined with parchment paper or greased, and flatten evenly.
- Cool: Let the treats cool and set in the refrigerator for at least an hour.
- Cut into squares: Once set, lift the treats out, place on a cutting board, and cut into squares or rectangles.
- Melt candy: Melt the red, white, and blue candies separately according to package instructions.
- Decorate: Drizzle each square with the melted candies and sprinkle with desired sprinkles.
- Set: Allow the treats to set at room temperature or in the refrigerator until firm.
Notes
- For a variation, you can use different colored candies to suit various occasions or themes.
- These treats can be stored in an airtight container for a few days, but are best enjoyed fresh.
- Prep Time: 15 minutes
- Cook Time: 5 minutes
- Category: Dessert
- Method: Mixing, Melting, Decorating
- Cuisine: American
Nutrition
- Serving Size: 1 treat
- Calories: 150
- Sugar: 12g
- Sodium: 100mg
- Fat: 4g
- Saturated Fat: 2g
- Unsaturated Fat: 2g
- Trans Fat: 0g
- Carbohydrates: 28g
- Fiber: 0g
- Protein: 1g
- Cholesterol: 5mg
Keywords: Independence Day, Rice Krispie Treats, Festive Dessert, Patriotic Recipe


